|
Management of Software RAID basicaly involves adding and removing the faulty and failed drives from the array. To understand better consider following example. |
|
|
|
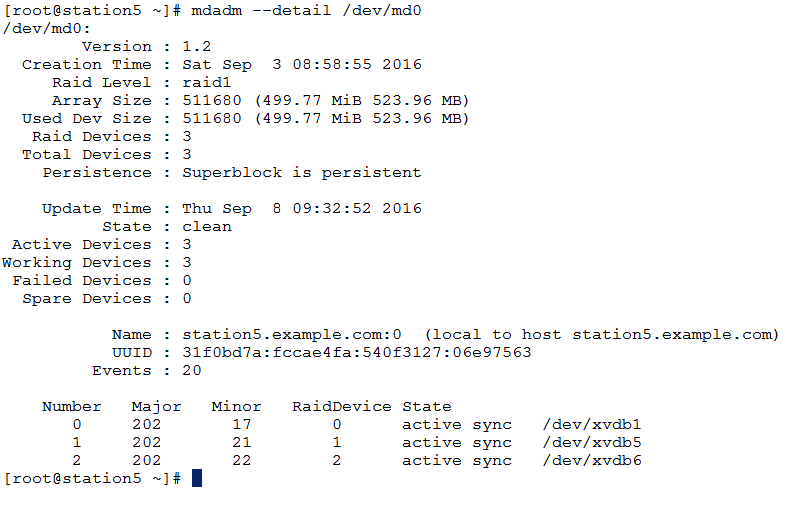
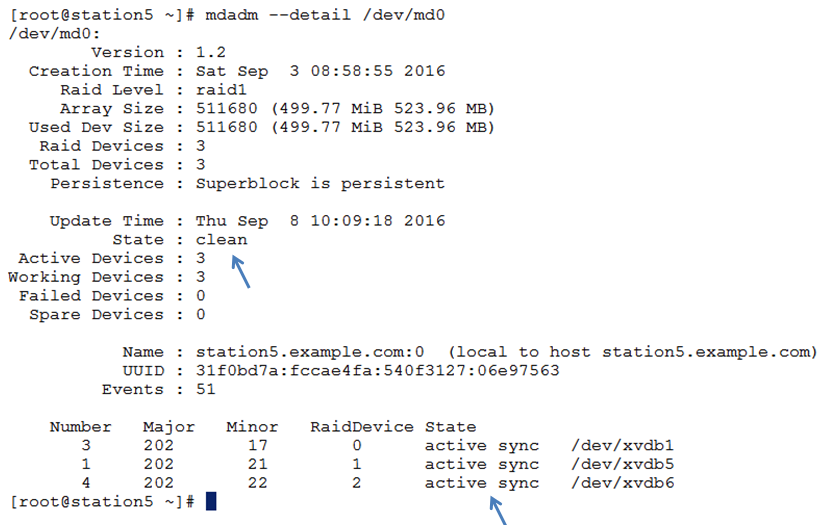
In above example, the drives /dev/xvdb1, /dev/xvdb5, /dev/xvdb6 seems to be clean and healthy. This is RAID Drive, it means even on single drive it can run. |
|
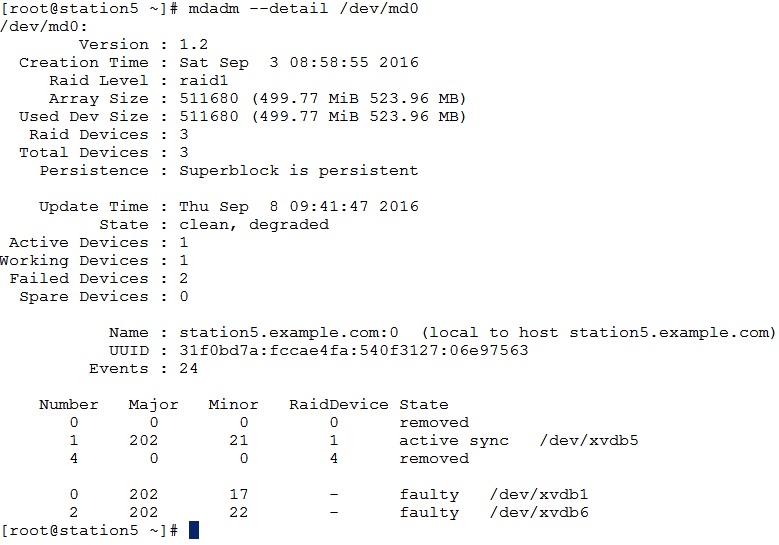
Now we are going to mark drive /dev/xvdb1, /dev/xvdb6 This can be done using following command. |
|
|
|
After marking the drives as fail, we can check using following command. |
|
|
|
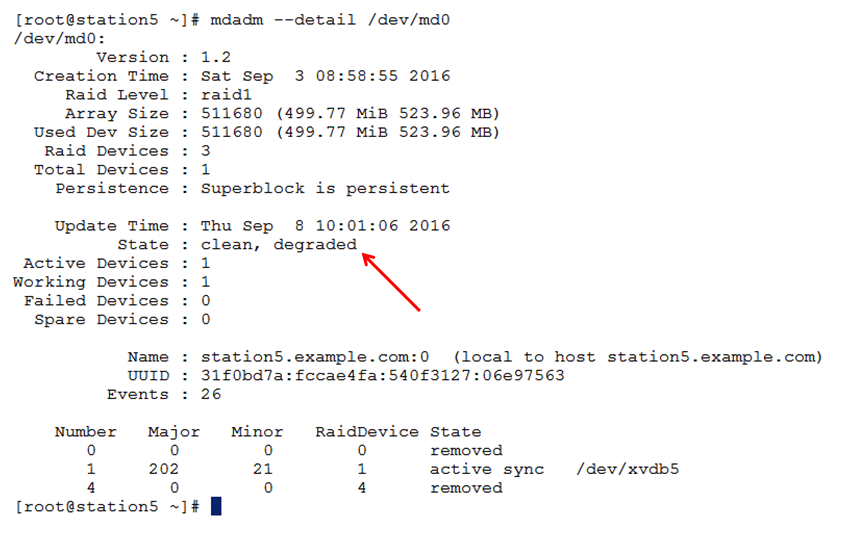
Now let us remove the faulty drives from array. |
|
|
|
And check the status. The status is still clean. It means the data is safe in the remaining drive. |
|
|
|
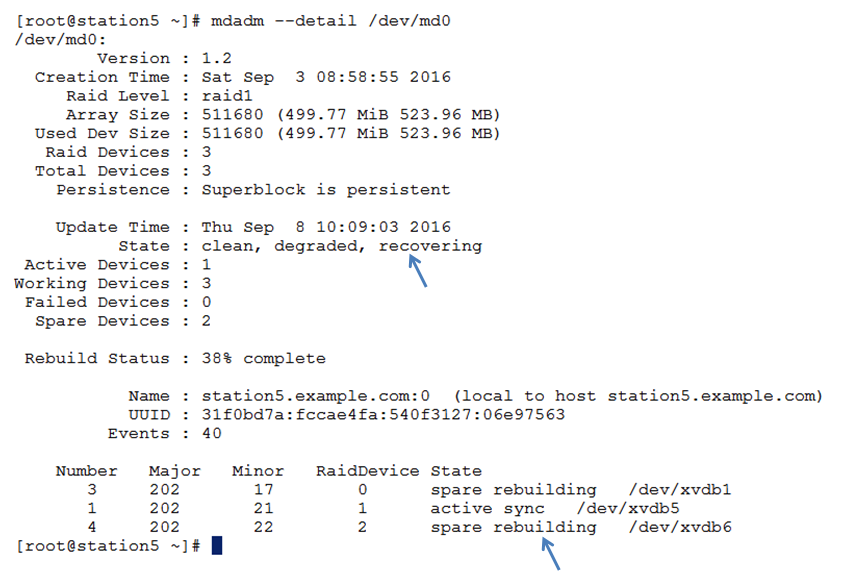
Now assume that we have got new empty disks /dev/xvdb1, /dev/xvdb6 and we wish to add these disks to the array again. This task can be accomplished by –add option. Just check below. |
|
|
|
Just after running this command, you can check the status of the drive. It should be rebuiding the data. |
|
|
|
Now after some time you can check the status again. The array is back to normal and all disks are in sync mode. This is OK State. |
|
|
|
That’s All ! Youd did it !! |