Below are the steps to install and configure Squid Proxy Server !
1. Check the installation of Squid Server.
# yum list squid
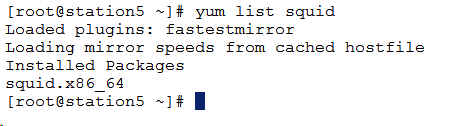
If it is not there then install
# yum install squid -y
.
2. Enable to start Squid Server at boot time.
# systemctl enable squid.service
.
3. If you are using Linux 7 then by default Squid allows you to browse internet via Port No. 3128. You need to configure access control list for this purpose. Below are the default lines in /etc/squid/squid.conf file.


In above example 10.0.0.0/8 and other networks are allowed. The rule set is http_access allow localnet.
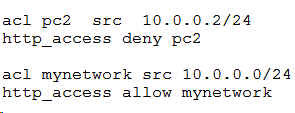
4. Now let us talk about following scenario.
Our Network : 10.0.0.0/24
Deny PC : 10.0.0.2/24
All other PC are allowed : Yes
For this purpose you need to add following lines in squid.conf file. Make sure to comment parallel line of same network. The sequence of lines is more important here. The general rule is deny policy should be first and then allow.
5. Now restart the sqired server and check in browser.
# systemctl restart squid.service
Make sure that it is working on Port No. 3128

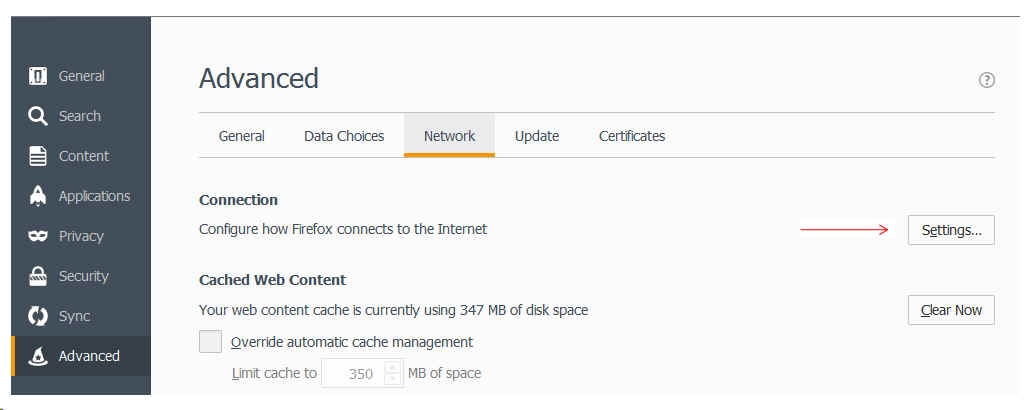
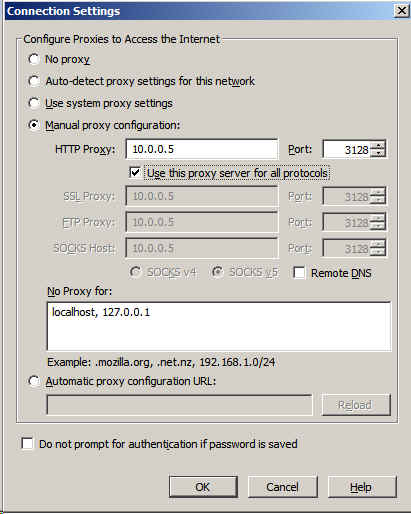
6. Now you have to set your browser such that is should point to Squid Server. In this case Squid Server is located on 10.0.0.5 and Port is 3128. I am using FireFox as Browser. Below are setting for FireFox Browser.
7. You should be able to browse Internet now via Squid Server. Notice speed by refreshing same pages.